
Installing Ubuntu Server on ZFS
No. 23
ZFS gives you checksummed data, cheap snapshots, and software RAID that you can actually trust. In this article I'll walk through installing Ubuntu Server on a two-drive server with the operating system on a mirrored ZFS pool and the bootloader on plain, mirrored ext4. We'll start with the step most people skip: making sure your RAID controller isn't getting in the way.
NOTE: This guide assumes your server has an out-of-band management interface, such as iDRAC, iLO, or IPMI, with a virtual console and virtual media. We use Dell servers, so the steps here use iDRAC, but the concepts carry over to the other management interfaces. Only the menu names will differ.
The layout we're building
NOTE: As of the writing of this article the latest LTS release is Ubuntu Server 26.04.1.
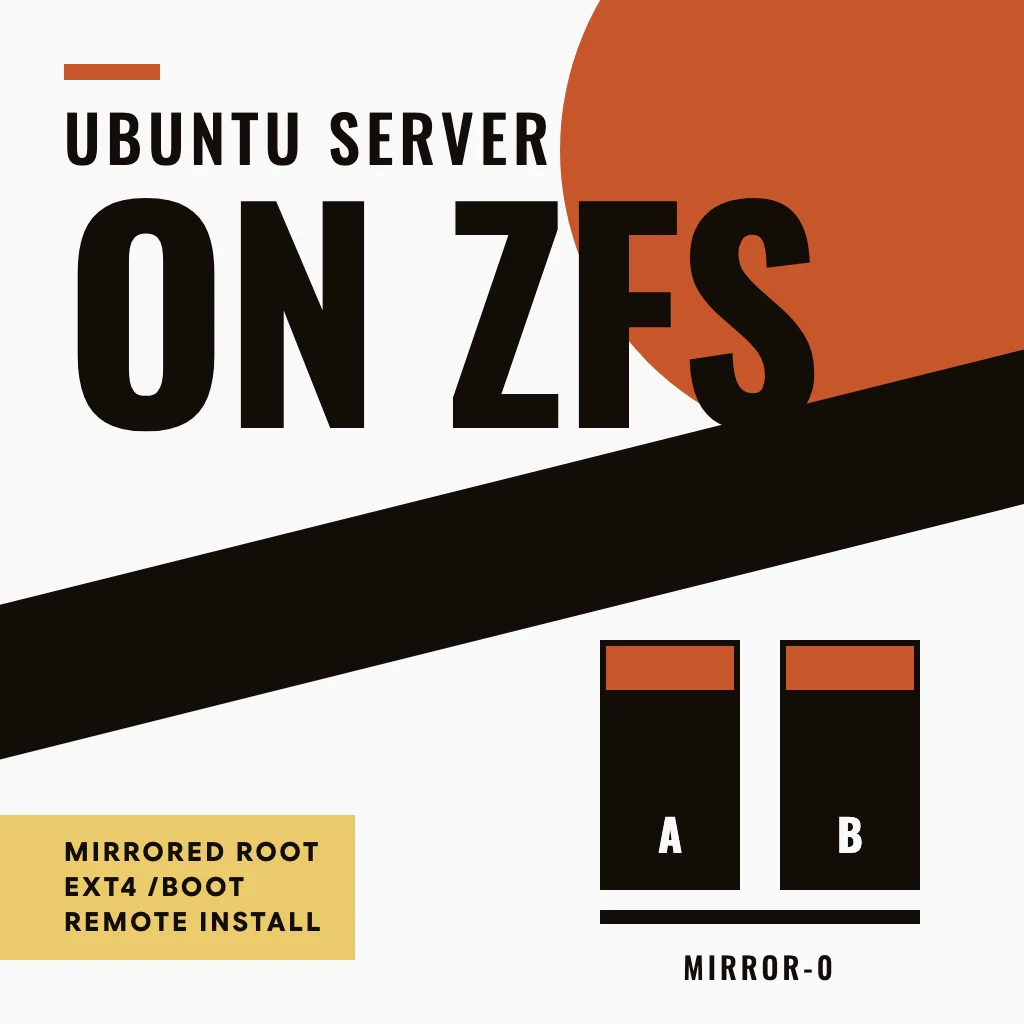
Here's the layout we're building. Each of the two drives gets three partitions:
| Partition | Size | Used for |
|---|---|---|
| 1 | 1 GB | EFI System Partition (FAT32), which the server's firmware boots from |
| 2 | 2 GB | /boot (ext4), mirrored across both drives with Linux software RAID (mdadm) |
| 3 | The rest | ZFS, mirrored across both drives, holding the operating system and everything else |
Why keep /boot off ZFS? The GRUB bootloader has to read /boot before ZFS has loaded, and GRUB's own ZFS support lags well behind OpenZFS. Putting /boot on ext4 means GRUB only ever reads a simple, well-supported filesystem, and you're free to use any ZFS feature on the rest of the system. It's also the direction Ubuntu itself is heading: starting with 26.10, the installer puts /boot on ext4 on Secure Boot systems.
The Ubuntu Server installer's custom storage screen can handle half of this layout: it can put an EFI System Partition on each drive and build the /boot RAID 1. What it can't do is create a ZFS pool, and its guided ZFS install only uses a single drive. So we'll describe the whole layout in an automated install file instead. Even there, the installer can create a ZFS pool but not a ZFS mirror. So it builds the pool on the first drive, and after the first boot we attach the second drive to turn it into a mirror.
This guide does the whole install remotely through a Dell iDRAC virtual console, using virtual media instead of USB drives. Other out-of-band consoles with virtual media work the same way, though their menus differ.
Steps
1. Set your RAID controller to HBA mode.
Before you boot the Ubuntu installer, check how your server's disk controller is configured. Most rack servers ship with a hardware RAID controller, and out of the box it is usually in RAID mode. For ZFS, you want it in HBA mode (sometimes called pass-through, JBOD, or IT mode, depending on the vendor).
WARNING: Switching a controller between RAID and HBA mode usually requires deleting any existing virtual disks. Back up anything you need first.
The setting lives in the controller's configuration utility. You can usually reach it from the storage settings in your out-of-band management interface, or from the server's firmware setup during boot. Menu names vary by vendor and firmware version, so look for an option along the lines of "Controller Mode", "Personality Mode", or "Switch to HBA mode".
If your controller doesn't offer an HBA or pass-through mode at all, don't work around it by creating a single-disk RAID 0 for every drive. Instead, flash it to IT mode firmware if the card supports it, or replace it with a dedicated HBA card.
You'll confirm it worked in step 5, from the Ubuntu installer's shell. Each physical drive should show up on its own, with its real model and serial number, rather than as a single "Virtual Disk":
lsblk -o NAME,SIZE,MODEL,SERIAL
Once Ubuntu is installed, you should also be able to read each drive's SMART data directly:
sudo smartctl -i /dev/sda
What is HBA?
HBA stands for Host Bus Adapter. In HBA mode, the disk controller acts as a simple pass-through: it connects the drives to the server and hands each one directly to the operating system, exactly as it is, with no RAID logic in between.
The contrast is RAID mode, where the controller sits in the middle and manages the disks itself. It combines them into virtual disks (RAID 1, RAID 5, etc.), uses its own cache and battery, handles rebuilds, and presents only those virtual disks to the OS. The OS never sees the individual drives.
Why HBA mode matters for ZFS
ZFS is designed to do the RAID job itself, in software. To do that well it needs direct, unfiltered access to each disk so it can:
- Read each drive's health (SMART) data
- Detect and repair silent data corruption using its checksums
- Know exactly when data is truly written to disk, rather than sitting in a controller's cache
If a RAID controller sits in the middle, it can hide errors, reorder writes, or report a write as complete when it's only in cache. That undermines the guarantees ZFS is built around. Running RAID and ZFS together is like having two managers who each think they're in charge.
2. Make sure the server boots in UEFI mode.
This layout boots through EFI System Partitions, so the server's firmware must be in UEFI boot mode, not legacy BIOS mode. In the iDRAC virtual console, reboot into System Setup (F2), open System BIOS > Boot Settings, and check that Boot Mode is set to UEFI.
3. Boot the installer through iDRAC and open a shell.
Download the Ubuntu Server LTS ISO from ubuntu.com/download/server to the computer you're running the iDRAC virtual console on.
In the virtual console:
- Open Virtual Media > Connect Virtual Media, then use Map CD/DVD to attach the ISO.
- Open the Boot menu and choose Virtual CD/DVD/ISO so the next boot uses it.
- Power cycle the server.
Before we hand the installer an install file, we need to look at the drives. When the installer's first screen appears, open the Help menu in the top-right corner and choose Enter shell. You'll use this shell for the next two steps.
4. Wipe the drives if they've been used before.
Both drives need to start empty. If either has been part of a ZFS pool before, old pool labels can survive a normal wipe and confuse the installer.
The installer shell doesn't include the ZFS tools, so zpool labelclear isn't available. Instead, we'll overwrite the labels directly. ZFS keeps four copies of its label on each device it uses: two at the start and two at the end. Zeroing the first and last 10 MB of each old ZFS partition removes all of them.
Start by finding the old ZFS partitions. They show up with the type zfs_member:
lsblk -o NAME,SIZE,FSTYPE
WARNING: The commands below destroy everything on the drive. Triple-check the device name before you run them.
For each zfs_member partition, set PART to it and zero both ends:
PART=/dev/sdX1
SECTORS=$(sudo blockdev --getsz $PART)
sudo dd if=/dev/zero of=$PART bs=512 count=20480
sudo dd if=/dev/zero of=$PART bs=512 count=20480 seek=$((SECTORS - 20480))
If ZFS used a whole drive instead of a partition, run the same commands with PART set to the drive itself, such as /dev/sdX.
Once every old ZFS partition is cleared, wipe the partition table and any remaining signatures from both drives:
sudo wipefs -a /dev/sdX
Check with lsblk -o NAME,SIZE,FSTYPE that both drives now show no partitions and no zfs_member.
5. Find each drive's ID and network port names.
The install file needs to know exactly which drives and network ports to use. While you're still in the installer shell, list the drives:
lsblk -o NAME,SIZE,MODEL,SERIAL
Besides your two drives, you'll also see the iDRAC's virtual devices, such as the mapped ISO. Ignore those. Then get the ID of each of your two drives:
udevadm info --query=property --name=/dev/sda | grep '^ID_SERIAL='
udevadm info --query=property --name=/dev/sdb | grep '^ID_SERIAL='
You'll get something like ID_SERIAL=Samsung_SSD_870_EVO_1TB_S6PUNX0R123456A. Note down the value after the = for both drives.
Next, the network. Datacenter connections are often more involved than a single cable. Ours is a bonded connection: two 10 Gb ports combined with LACP, with traffic tagged on a VLAN that the datacenter assigned. Ask your provider whether yours is bonded, whether it needs a VLAN tag, and which IP address, gateway, and DNS servers to use.
List the server's network ports. The ones with a cable plugged in show LOWER_UP:
ip -br link
Note down the names of the cabled ports, such as eno1 and eno2.
TIP: If you can't reach the gateway, check the reverse DNS names in your provider's IP assignment page. They often give away details nobody told you. On one of our servers, the gateway's name was
vlan-2226.aggrds118-1.ord6.scnet.net, which revealed the VLAN ID (2226). Two addresses we'd been told were ours had router names, which showed they were already taken by the provider's routers. Using one of those addresses means the gateway will never answer you.
Leave the server sitting at the installer for now. We'll restart it once the install file is ready.
6. Write the install file.
Back on your own computer, create a hashed password for your user account. On Linux, openssl can do this directly. On macOS, the built-in openssl doesn't support SHA-512 hashes, so use Homebrew's:
brew install openssl
$(brew --prefix openssl)/bin/openssl passwd -6
Now create a file named user-data in an empty folder. Replace the hostname, username, password hash, SSH public key, network details, and the two drive IDs from step 5 with your own:
#cloud-config
autoinstall:
  version: 1
  identity:
    hostname: server01
    username: ubuntu
    password: "$6$REPLACE_WITH_YOUR_PASSWORD_HASH"
  ssh:
    install-server: true
    allow-pw: false
    authorized-keys:
      - "ssh-ed25519 AAAA_REPLACE_WITH_YOUR_PUBLIC_KEY [email protected]"
  network:
    version: 2
    ethernets:
      # The two cabled ports from step 5. They carry no IP address themselves.
      eno1: {}
      eno2: {}
    bonds:
      # Combine both ports into one LACP (802.3ad) bonded connection.
      bond0:
        interfaces:
          - eno1
          - eno2
        parameters:
          mode: 802.3ad
          mii-monitor-interval: 100
    vlans:
      # Tag traffic with the VLAN your provider assigned, and put the IP here.
      vlan2226:
        id: 2226
        link: bond0
        addresses:
          - REPLACE_WITH_YOUR_IP/28
        routes:
          - to: default
            via: REPLACE_WITH_YOUR_GATEWAY_IP
        nameservers:
          addresses:
            - 1.1.1.1
            - 8.8.8.8
  storage:
    swap:
      size: 0
    config:
      # The two drives.
      - type: disk
        id: disk0
        serial: REPLACE_WITH_DRIVE_1_ID
        ptable: gpt
        wipe: superblock-recursive
      - type: disk
        id: disk1
        serial: REPLACE_WITH_DRIVE_2_ID
        ptable: gpt
        wipe: superblock-recursive

      # Partition 1 on each drive: the EFI System Partition. GRUB is installed to both.
      - type: partition
        id: disk0-esp
        device: disk0
        number: 1
        size: 1G
        flag: boot
        grub_device: true
      - type: partition
        id: disk1-esp
        device: disk1
        number: 1
        size: 1G
        flag: boot
        grub_device: true

      # Partition 2 on each drive: a member of the /boot RAID 1.
      - type: partition
        id: disk0-boot
        device: disk0
        number: 2
        size: 2G
        flag: raid
      - type: partition
        id: disk1-boot
        device: disk1
        number: 2
        size: 2G
        flag: raid

      # Partition 3 on each drive: the rest of the drive, for ZFS.
      - type: partition
        id: disk0-zfs
        device: disk0
        number: 3
        size: -1
      - type: partition
        id: disk1-zfs
        device: disk1
        number: 3
        size: -1

      # Format both EFI System Partitions.
      - type: format
        id: disk0-esp-fs
        volume: disk0-esp
        fstype: fat32
      - type: format
        id: disk1-esp-fs
        volume: disk1-esp
        fstype: fat32

      # Mirror the two /boot partitions and format the mirror as ext4.
      - type: raid
        id: boot-raid
        name: md0
        raidlevel: 1
        devices:
          - disk0-boot
          - disk1-boot
      - type: format
        id: boot-raid-fs
        volume: boot-raid
        fstype: ext4

      # The ZFS pool, on the first drive only. The second drive is attached after install.
      - type: zpool
        id: rpool
        pool: rpool
        vdevs:
          - disk0-zfs
        mountpoint: /
        # The same pool settings Ubuntu's own ZFS install uses.
        pool_properties:
          ashift: 12
          autotrim: "on"
          version: null
        fs_properties:
          acltype: posixacl
          atime: null
          canmount: "off"
          compression: lz4
          devices: "off"
          dnodesize: auto
          normalization: formD
          relatime: "on"
          sync: standard
          xattr: sa
      - type: zfs
        id: rpool-root
        pool: rpool
        volume: ROOT
        properties:
          canmount: "off"
          mountpoint: none
      - type: zfs
        id: rpool-root-ubuntu
        pool: rpool
        volume: ROOT/ubuntu
        properties:
          canmount: "on"
          mountpoint: /
      - type: zfs
        id: rpool-home
        pool: rpool
        volume: home
        properties:
          canmount: "on"
          mountpoint: /home

      # Mount points for the non-ZFS filesystems.
      - type: mount
        id: boot-mount
        device: boot-raid-fs
        path: /boot
      - type: mount
        id: esp-mount
        device: disk0-esp-fs
        path: /boot/efi
        # nofail: still boot from the second drive if this one is gone.
        options: umask=0077,nofail
The installer also expects a meta-data file next to it. It can be empty:
touch meta-data
What the settings do:
networksets up a static IP on a bonded, VLAN-tagged connection, so the server comes online during the install with no DHCP needed. Replace the IP address and gateway with the ones your provider gave you, and the/28with your subnet's prefix length. If your connection isn't bonded, drop thebondssection and set the VLAN'slinkto your single port. If it doesn't need a VLAN tag either, drop thevlanssection and putaddresses,routes, andnameserversdirectly under the port inethernets.identitycreates your user account. The installer requires it.sshinstalls the OpenSSH server, disables password logins, and adds your public key.- Use two drives of the same size. The ZFS partition on the second drive must be at least as big as the one on the first, or
zpool attachin step 9 refuses it. If your drives differ, make the smaller onedisk0. - The
/boot/efimount hasnofailso that a dead first drive doesn't stop the server from booting off the second one. Without it, the system would wait for the missing EFI partition and drop to an emergency shell. swap: size: 0stops the installer from creating a swap file. A swap file on ZFS isn't supported, and many servers with plenty of RAM run without swap.storage: config:describes the layout from the table above, piece by piece. Each entry has anid, and later entries refer to earlier ones by thatid. Note that thepoolin eachzfsentry refers to the pool'sid, not its name.- Inside the pool,
rpool/ROOT/ubuntuholds the operating system andrpool/homeholds home directories. Keeping the OS in its own dataset underROOTmeans you can snapshot and roll it back without touching anyone's files. - The OS dataset must have
canmount: "on"andmountpoint: /. The installer only counts a dataset as your root filesystem if both are set, and otherwise stops withautoinstall config did not mount root. pool_propertiesandfs_propertiescopy the settings Ubuntu's own ZFS install uses, such aslz4compression and 4K-aligned writes (ashift: 12).version: nullmatters: without it, the pool is created in an old compatibility format.- Quote
"on"and"off". Unquoted, YAML reads them as true and false.
7. Package the install file as a disk image.
The installer automatically checks any drive labeled CIDATA for a user-data file. With iDRAC, that "drive" can be a small disk image mapped as virtual removable media, alongside the ISO.
Build the image from the folder with your two files. On macOS, install the FAT filesystem tools with Homebrew first:
brew install dosfstools mtools
Then create an 8 MB FAT image labeled CIDATA, copy both files into it, and list its contents to check:
mkfs.vfat -C -n CIDATA cidata.img 8192
mcopy -i cidata.img user-data meta-data ::
mdir -i cidata.img ::
8. Install Ubuntu Server.
In the iDRAC virtual console:
- Open Virtual Media > Connect Virtual Media. Keep the ISO mapped as the CD/DVD, and use Map Removable Disk to attach
cidata.img. - Open the Boot menu and choose Virtual CD/DVD/ISO again.
- Power cycle the server.
This time the installer finds your user-data file and runs the install for you. The installer may ask you to confirm before it erases the disks, because we didn't add autoinstall to the kernel command line. That's a useful last chance to back out.
Virtual media is read over the network from your computer, so the install is slower than from a local USB drive. Keep the virtual console open until it finishes.
When the installation finishes, disconnect the virtual media and reboot. Log in over SSH with the key you added.
Check that everything landed where it should:
lsblk -o NAME,SIZE,FSTYPE,MOUNTPOINTS
cat /proc/mdstat
zpool status -P
You should see /boot on md0 with both drives' second partitions active, /boot/efi on the first drive's EFI partition, and a pool named rpool with a single device: the first drive's third partition. The second drive's EFI partition isn't mounted. That's normal, and step 10 covers it.
9. Attach the second drive to the pool.
zpool attach adds a new device alongside an existing one, turning a single-disk pool into a mirror. You need two paths:
- The existing device, exactly as it appears under
rpoolin thezpool status -Poutput. - The second drive's ZFS partition. List the drive IDs with
ls -l /dev/disk/by-id/and use the one for the second drive, with-part3on the end.
sudo zpool attach rpool EXISTING_DEVICE /dev/disk/by-id/SECOND_DRIVE-part3
ZFS immediately starts copying data to the new drive. This is called resilvering. Wait for it to finish:
sudo zpool wait -t resilver rpool
zpool status
The pool should now show a mirror-0 with both drives ONLINE.
10. Make sure both drives are bootable.
The /boot RAID and the ZFS pool are both mirrored now, but there's one more piece. The EFI System Partition is what the server's firmware reads first, and it can't be mirrored with RAID or ZFS. Instead, each drive has its own copy, and GRUB has to be installed to both.
The grub_device: true on both EFI partitions in the install file told the installer to do this already. Only the first one is mounted, at /boot/efi; Ubuntu mounts the others itself whenever it updates GRUB. Check that Ubuntu knows about both:
sudo debconf-show grub-efi-amd64 | grep install_devices
You should see two partitions listed. If you only see one, add the second:
sudo dpkg-reconfigure grub-efi-amd64
Accept the defaults until you reach the list of EFI partitions to install to. Use the space bar to select both, then continue.
If either command says
grub-efi-amd64isn't installed, usegrub-efi-amd64-signedinstead.
Finally, check that the firmware has a boot entry for each drive:
sudo efibootmgr -v
11. Test it remotely.
Don't trust a mirror you haven't tested. When your server is in a colo you can't pull a drive, but you can get close: take one drive out of both mirrors in software, then boot the server from the other drive. Do this before the server goes into production.
First, set two variables for the drive you're taking out, using the same /dev/disk/by-id/ names as in step 9. Start with the first drive:
OUT_ZFS=/dev/disk/by-id/FIRST_DRIVE-part3
OUT_BOOT=/dev/disk/by-id/FIRST_DRIVE-part2
Take it out of the ZFS pool and the /boot RAID:
sudo zpool offline rpool $OUT_ZFS
sudo mdadm --manage /dev/md0 --fail $OUT_BOOT
sudo mdadm --manage /dev/md0 --remove $OUT_BOOT
Next, find the firmware boot entry for the other drive. efibootmgr -v lists each entry with the partition ID it boots from, and lsblk shows which drive has that partition:
sudo efibootmgr -v
lsblk -o NAME,SERIAL,PARTUUID
Tell the firmware to use that entry for the next boot only, then reboot. Replace XXXX with the entry's four-digit number:
sudo efibootmgr --bootnext XXXX
sudo reboot
Watch the boot in the iDRAC virtual console. Once the server is back, log in and check:
sudo efibootmgr | grep BootCurrent
zpool status
cat /proc/mdstat
BootCurrent should match the entry you chose. rpool should be DEGRADED with the first drive OFFLINE, and md0 should be running on one member. That proves the second drive can boot and run the system on its own.
Now put the first drive back into both mirrors and wait for them to catch up:
sudo zpool online rpool $OUT_ZFS
sudo mdadm --manage /dev/md0 --add $OUT_BOOT
sudo zpool wait -t resilver rpool
cat /proc/mdstat
ZFS only resilvers what changed while the drive was offline, so this is quick. Once both are fully synced, repeat the whole test with the second drive taken out and the first drive's boot entry.
Finally, check that the firmware's normal boot order includes both drives' entries, so it falls back to the second drive on its own if the first one dies. Look at the BootOrder line near the top of efibootmgr output. It lists entry numbers in the order the firmware tries them, and both drives' Ubuntu entries should come first. If one is missing or comes after the network boot entries, set the order explicitly, listing both drives' entries first and then every other entry from the current BootOrder. Any entry you leave out is dropped from the order:
sudo efibootmgr --bootorder XXXX,YYYY,REST_OF_CURRENT_ORDER
For example, if BootOrder is 0007,0003,0001,0002 and the drives' entries are 0003 and 0004, run sudo efibootmgr --bootorder 0003,0004,0007,0001,0002.
This test covers the parts you control: both boot paths, and both mirrors running on one drive. It can't show how the server behaves when a drive actually fails in hardware. If your colo offers remote hands, a supervised drive pull before go-live is still worth it.
12. Keep the pool healthy.
A scrub reads every block in the pool and checks it against its checksum, repairing anything that's gone bad from the other drive in the mirror. On Ubuntu, the zfsutils-linux package schedules a monthly scrub of every pool for you. You can run one by hand at any time:
sudo zpool scrub rpool
Snapshots are instant and take no space until data changes, so take one before anything risky, like a release upgrade. /boot lives on the ext4 RAID, not in the pool, so a snapshot alone doesn't cover it, and an upgrade replaces the kernels there. Copy /boot into the pool first, then take the snapshot, so the snapshot holds both:
sudo tar -czf /root/boot-before-upgrade.tar.gz -C / boot
sudo zfs snapshot -r rpool@before-upgrade
If you roll back with zfs rollback, restore /boot from that archive as well, so the kernels match the system they belong to.
Finally, check zpool status and cat /proc/mdstat regularly, or set up the ZFS Event Daemon (ZED) and mdadm's monitor to email you when a drive faults. A mirror only protects you if you replace the failed drive before the second one goes.
In a colo, replacing a failed drive means asking the facility's remote hands to swap it. iDRAC's storage pages show which slot each drive is in, and can usually blink the drive's LED so they pull the right one.
Once the new drive is in:
- Copy the partition table from the surviving drive with
sudo sgdisk --replicate=NEW_DRIVE SURVIVING_DRIVE(the new drive comes first), then give the copy unique IDs withsudo sgdisk --randomize-guids NEW_DRIVE. - Add its second partition back to the
/bootRAID withsudo mdadm --manage /dev/md0 --add NEW_DRIVE-part2. - Swap its third partition in for the failed one with
sudo zpool replace rpool FAILED_DEVICE NEW_DRIVE-part3. - Format its first partition with
sudo mkfs.vfat -F 32 NEW_DRIVE-part1, then rundpkg-reconfigure grub-efi-amd64and select the new drive's EFI partition alongside the surviving one. If the failed drive was the first one, also point/boot/efiin/etc/fstabat the surviving drive's EFI partition.
Conclusion
Getting Ubuntu Server onto ZFS takes more work than clicking through the installer. Once it's done, though, you have a server that checksums every block, mirrors every byte across both drives, can snapshot itself before any risky change, and boots from either drive if the other one fails. The biggest lessons for us were getting the RAID controller out of the way with HBA mode, describing the whole layout in an install file, and not trusting the network details until the gateway answers. I hope this saves someone else a few trips through the virtual console.
Cheers 🥂